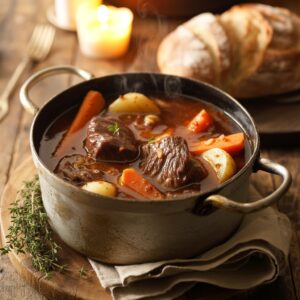
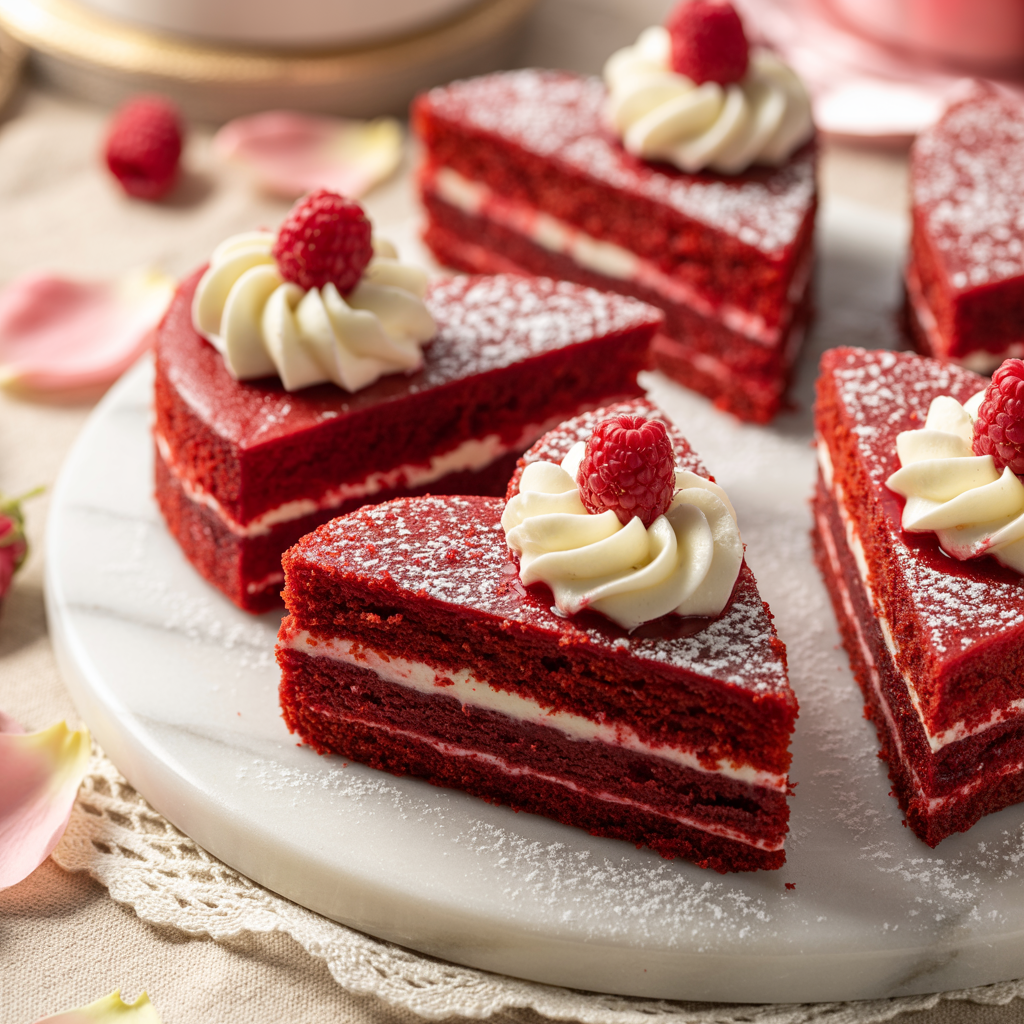
Treat yourself and someone special to a homemade Valentine’s red velvet cake hearts masterpiece — a tender, cocoa-kissed cake with tangy cream cheese frosting, shaped and decorated to look like a little love letter on a plate. There’s something almost magical about slicing into a heart-shaped slice and watching that crimson crumb peek through a cloud of ivory frosting. Whether you’re planning a candlelit date night, surprising a best friend, packing mini heart cakes into a child’s lunchbox, or just craving one of the most iconic Valentine’s Day desserts of the season, this guide has you covered.
Below you’ll find an easy red velvet heart cake recipe, step-by-step decorating techniques, dietary-friendly swaps (gluten-free and vegan included!), and creative ideas for packaging your homemade Valentine’s cake as a gift. Even intermediate bakers will appreciate the troubleshooting section and high-altitude notes. Ready to bake something unforgettable? Let’s get into it.
Ingredients at a Glance
This red velvet cake hearts recipe uses pantry staples with just a few specialty touches. All amounts are in US customary measurements, with metric in parentheses for precision.
For the Heart Cakes
| Ingredient | Amount |
|---|---|
| All-purpose flour (or cup-for-cup GF flour) | 2½ cups (315 g) |
| Granulated sugar | 1½ cups (300 g) |
| Unsweetened cocoa powder | 2 Tbsp (10 g) |
| Baking soda | 1 tsp |
| Salt | ½ tsp |
| Large eggs, room temperature | 2 |
| Vegetable oil (or melted coconut oil) | 1 cup (240 ml) |
| Buttermilk, room temperature | 1 cup (240 ml) |
| Distilled white vinegar | 1 tsp |
| Pure vanilla extract | 2 tsp |
| Red gel food coloring (or beet powder alternative) | 1–2 Tbsp |
For the Cream Cheese Frosting
| Ingredient | Amount |
|---|---|
| Full-fat cream cheese, softened | 16 oz (450 g) |
| Unsalted butter, softened | ½ cup (113 g) |
| Powdered sugar, sifted | 4 cups (480 g) |
| Vanilla extract | 1 tsp |
| Pinch of salt | — |
Optional décor: edible gold leaf, freeze-dried strawberry dust, crushed candy hearts, fresh raspberries, edible rose petals.
Equipment and Baking Tips
Before you preheat the oven, let’s talk tools. This heart-shaped cake tutorial works with a few different setups, so choose what you already have:
- Heart-shaped cake pans (8-inch or 9-inch): Ideal for clean, bakery-style layers. Two pans give you a classic layered cake.
- Round pans + heart cookie cutter: Bake two 8-inch round layers, then stamp out hearts for a stacked mini heart cakes effect.
- Heart-shaped muffin tin: Perfect for red velvet cupcakes hearts — you’ll get about 24 mini cakes.
- Standard muffin tin with heart liners: A budget-friendly workaround.
Essential Tools
A stand mixer or hand-held electric mixer makes the creaming step effortless. An offset spatula is your best friend for smooth frosting, while a piping bag fitted with a 1M star tip produces those dreamy rosettes. Don’t forget parchment paper (cut to fit your pan’s base) and a handful of toothpicks for doneness testing.
Quick Success Tips
- Room-temperature ingredients emulsify better, producing a finer crumb.
- Don’t overmix once the flour is added — overworked gluten leads to a dense cake.
- Sift your cocoa powder and powdered sugar to eliminate lumps.
- Check for doneness with a toothpick inserted into the thickest part of the heart (the bottom center); it should come out with a few moist crumbs, not wet batter.
🎯 Internal linking suggestions
- Link “Valentine’s Day desserts” to your seasonal dessert roundup.
- Link “cream cheese frosting recipe” to a dedicated frosting tutorial.
- Link “mini heart cakes” to your kid-friendly baking projects archive.
Step-by-Step Recipe: Valentine’s Red Velvet Cake Hearts
Prep time: 25 minutes · Bake time: 25–30 minutes · Cool + decorate: 1 hour · Total: ~2 hours · Yield: one 2-layer 8-inch heart cake (serves 10–12)
1. Preheat and Prep the Pans
Preheat your oven to 350∘F (175∘C). Grease two 8-inch heart-shaped cake pans with butter or baking spray, then line the bottoms with parchment cut to fit. Lightly dust the sides with flour, tapping out the excess. This step is non-negotiable — heart pans have tricky corners, and parchment guarantees a clean release.
2. Combine the Dry Ingredients
In a medium bowl, whisk together the flour, cocoa powder, baking soda, and salt until uniform. Set aside. Whisking aerates the mixture and distributes the leavener evenly, which matters for a level rise.
3. Mix the Wet Ingredients
In the bowl of your stand mixer (or a large mixing bowl), beat the eggs and granulated sugar on medium-high speed for about 2 minutes, until pale and slightly fluffy. Drizzle in the vegetable oil while mixing on low. Add the buttermilk, vinegar, vanilla extract, and red food coloring alternatives of your choice (or classic gel coloring), mixing just until the batter turns a vibrant, uniform crimson.
Color tip: Gel food coloring is far more concentrated than liquid drops. Start with 1 tablespoon and add more if needed. For a natural option, whisk 3 tablespoons of beet powder into the buttermilk before adding — it gives a softer, earthier red with a subtle fruity undertone.
4. Combine Wet and Dry
Reduce the mixer to low speed. Add the dry ingredients in three additions, mixing only until the flour disappears. Scrape down the sides of the bowl with a silicone spatula halfway through. The finished batter should be silky, glossy, and pourable — not stiff.
5. Divide and Bake
Divide the batter evenly between the two prepared pans (a kitchen scale helps — aim for about 525 g per pan). Smooth the tops with your spatula, and give each pan a gentle tap on the counter to release air bubbles.
Bake for 25–30 minutes at 350∘F (175∘C). Begin checking at 25 minutes with a toothpick. If the tops are browning too quickly but the centers aren’t set, tent loosely with foil for the final 5 minutes.
⏱️ Baking time adjustments for different pan types
| Pan Type | Bake Time |
|---|---|
| Two 8-inch heart pans | 25–30 min |
| Two 9-inch heart pans | 20–25 min |
| Heart-shaped muffin tin (mini cakes) | 14–18 min |
| Standard cupcakes with heart liners | 18–22 min |
| Single 9×13 sheet (for cut-out hearts) | 28–33 min |
6. Cool Completely
Let the cakes cool in their pans on a wire rack for 15 minutes. Then run a thin knife around the edges and invert them onto the rack to cool fully — at least 1 hour. Frosting a warm cake will melt your cream cheese frosting recipe into a sad, sugary puddle.
7. Level and Assemble
If your cakes domed during baking, use a serrated bread knife to level the tops. Place the first layer on your serving plate or cake board. Pipe or spread a generous layer of frosting over the top, then carefully set the second heart layer on top, aligning the points and curves.
For a single-layer heart cake: skip the stacking and simply frost the top and sides of one cooled heart — a beautiful, simpler option for smaller gatherings.
8. Apply the Crumb Coat
Spread a thin layer of frosting over the entire cake to trap any loose crumbs. Refrigerate for 20 minutes. This “crumb coat” is the secret to that immaculate, bakery-window finish.
Cream Cheese Frosting Recipe and Decorating Techniques
The Frosting
Beat the softened cream cheese and butter together on medium-high speed until smooth and lump-free, about 2 minutes. Gradually add the sifted powdered sugar, one cup at a time, mixing on low. Once incorporated, increase speed to high and beat for 2 minutes until fluffy. Add the vanilla and salt.
Stabilizing tip for piping: If your kitchen is warm or you plan to pipe elaborate designs, add 2 tablespoons of heavy cream and 1 tablespoon of cornstarch to the frosting. This gives it structure without compromising flavor.
Decorating Ideas for Your Valentine’s Red Velvet Cake Hearts
Your finished Valentine’s red velvet cake hearts deserve a look that matches their flavor. Here are five go-to techniques, from minimalist to maximalist:
- Smooth finish with ruffle edge: Use a bench scraper to achieve glass-smooth sides, then pipe a border of small shells or ruffles along the top edge using a Wilton #104 petal tip.
- Piped rosettes all over: Cover the entire top with tight rosettes using a 1M star tip. Alternate pink and white frosting for a romantic ombré.
- Chocolate drip: Warm ½ cup of heavy cream to a simmer, pour over 4 oz of chopped dark chocolate, stir until glossy. Let it cool slightly, then drizzle over the cake’s edge with a spoon so it cascades down the sides.
- Edible glitter & gold leaf: A light dusting of edible shimmer powder and a few flakes of gold leaf transform the cake into a showpiece for date night.
- Crushed candy hearts + berries: Top with fresh raspberries, a sprinkle of freeze-dried strawberry dust, and coarsely crushed conversation hearts for a playful, classroom-safe finish.
Pro decorator move: Chill the frosted cake for 15 minutes before adding any
final décor — this prevents sprinkles from sinking and drips from sliding.
Variations and Dietary Swaps
One of the best things about this red velvet heart cake recipe is how adaptable it is. Here’s how to customize it for different needs without sacrificing flavor.
Gluten-Free Red Velvet Hearts
Swap the all-purpose flour for a cup-for-cup gluten-free flour blend (brands like King Arthur Measure for Measure or Bob’s Red Mill 1-to-1 work beautifully). If your blend doesn’t already contain xanthan gum, add ½ teaspoon to the dry ingredients. Expect a slightly more tender crumb — handle the layers gently during assembly.
Vegan Red Velvet Option
- Replace eggs with flax eggs (1 Tbsp ground flaxseed + 3 Tbsp water per egg, rested 5 min).
- Use plant-based milk + 1 tsp lemon juice as a buttermilk substitute.
- Swap butter for vegan butter sticks (not tub-style, which has too much water).
- For the frosting, use vegan cream cheese and vegan butter; chill the frosting 30 minutes before piping to firm it up.
Mini Heart Cakes and Red Velvet Cupcakes Hearts
Use the same batter in a heart-shaped muffin tin. Bake at 350∘F (175∘C) for 14–18 minutes. These are perfect for bake sales, lunchbox surprises, or individual place settings at a Valentine’s dinner. Top each with a single piped rosette and a fresh raspberry.
Healthier Tweaks
- Reduce sugar to 1¼ cups (the cake will be less sweet but still balanced by the frosting).
- Substitute half the oil with unsweetened applesauce for a lighter texture.
- Use beet powder instead of food coloring for a natural hue plus a boost of antioxidants.
Packaging, Gifting, and Presentation Ideas
A beautifully wrapped cake turns a homemade treat into a keepsake-worthy gesture. Here’s how to present your red velvet cake gift packaging like a pro.
Transporting Safely
Use a cake box that’s at least 2 inches wider than your heart on all sides. Place a non-slip mat or a dab of frosting under the cake board to prevent sliding. For mini heart cakes, arrange them in a divided pastry box with parchment doilies under each one.
Wrapping and Finishing Touches
- Wrap finished boxes in cellophane and tie with satin ribbon in blush or burgundy.
- Attach a custom-printed gift tag (hand-lettered or printable PNG).
- Tuck in a sprig of dried baby’s breath or a single fresh rose for an upscale look.
Gift note idea:
“Baked with love, frosted with care — every bite is a little ‘I love you.’ Happy Valentine’s Day. 🤍”
Date Night Presentation
Plate individual slices on white ceramic, garnish with fresh raspberries, a dusting of powdered sugar, and a drizzle of raspberry coulis. Pair with a glass of rosé or sparkling cider.
Classroom-Safe Option
For school treats, skip perishable cream cheese frosting and use a shelf-stable vanilla buttercream or a simple powdered sugar glaze. Individually wrap each mini heart cake in clear treat bags with twist ties.
Troubleshooting & FAQs
Even seasoned bakers run into hiccups. Here are the most common issues with this red velvet cake hearts recipe and how to fix them.
| Problem | Likely Cause | Quick Fix |
|---|---|---|
| Cake is dense or gummy | Overmixed batter or cold ingredients | Mix only until flour disappears; bring ingredients to room temp |
| Color came out pale | Not enough food coloring, or used liquid instead of gel | Use 1–2 Tbsp gel coloring next time; avoid liquid drops |
| Frosting is runny | Butter or cream cheese was too warm | Chill frosting 30 min, re-whip, and add ¼ cup more powdered sugar |
| Cake cracked while removing | Insufficient greasing or removed too hot | Always use parchment; cool in pan 15 min before inverting |
| Uneven heart shape | Pan wasn’t level in the oven | Use an oven thermometer and rotate pans halfway through baking |
🏔️ High-altitude adjustments (above 3,500 ft / 1,067 m)
- Reduce baking soda to ¾ tsp.
- Add 1–2 Tbsp extra flour.
- Reduce sugar by 1 Tbsp.
- Increase oven temp to 360∘F (182∘C) and reduce bake time by 3–5 minutes.
- Add an extra tablespoon of buttermilk to compensate for faster moisture evaporation.
Ready to Bake Something Beautiful?
There’s nothing quite like pulling a tray of Valentine’s red velvet cake hearts from the oven and watching someone’s face light up at the first bite. Whether you’re baking for a partner, a parent, a classroom full of kids, or simply treating yourself, this recipe delivers that perfect balance of cocoa warmth, tangy frosting, and pure visual charm.
Try the recipe tonight and tag @YourHandle with #RedVelvetHearts — I can’t wait to see your creations! For more romantic dessert ideas, check out our Valentine’s Day dessert roundup, cream cheese frosting tutorial, and kid-friendly baking projects.
📬 Subscribe below for more holiday desserts, printable gift tags, and seasonal baking guides delivered straight to your inbox.