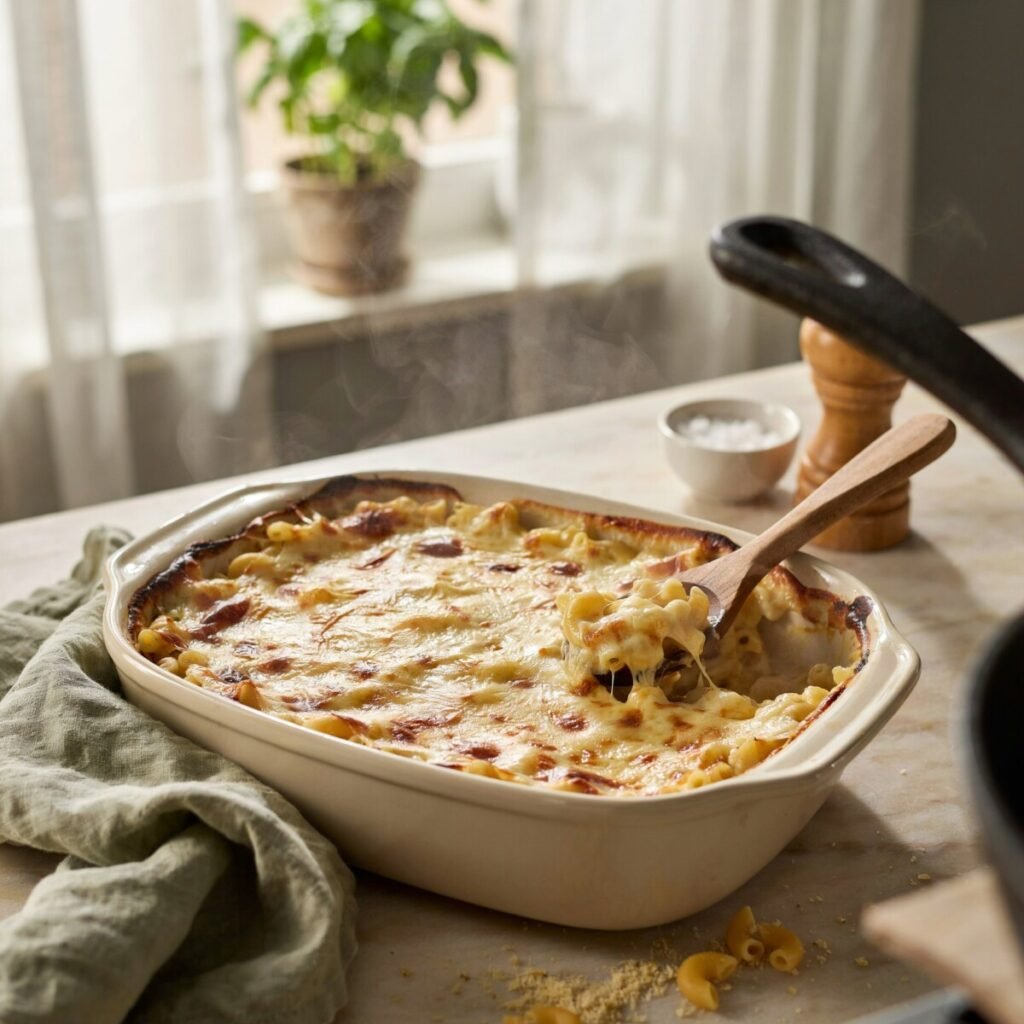
Grandma’s Mac and Cheese Baked Golden is the kind of dish that announces itself the moment you open the oven: warm, buttery steam rising, a crunchy golden top that gives way to a creamy, tangy cheese sauce underneath. This recipe blends the simple comfort of childhood with a few modern tips — a silky roux-based sauce, a mix of sharp cheddar and Gruyère, and a crisp panko topping — to create a reliably perfect bake every time. It’s easy enough for a weeknight family dinner and special enough for holiday sides.
I can still picture my grandmother standing by her vintage avocado-green oven, wearing her favorite floral apron, pulling out a heavy glass Pyrex dish. The sound of the crust crackling as it met the cooler kitchen air was music to my ears. She never used a fancy recipe card; she just knew by touch, smell, and sight when her golden baked mac and cheese was ready.
Today, I’m sharing her secrets with you. Whether you are looking for the ultimate holiday side dish or just a deeply satisfying weekend meal, this homemade mac and cheese delivers pure, unadulterated nostalgia. It’s the best mac and cheese recipe for those who crave a crisp top and a molten, gooey center. Let’s tie on our aprons and get cooking!
Why This Baked Mac and Cheese Works So Well
When it comes to comfort food recipes, technique is just as important as the ingredients. This stovetop to oven mac and cheese relies on a few foundational culinary principles to guarantee success.
First, we use a roux-based cheese sauce. A roux is simply a cooked mixture of equal parts fat (butter) and flour. Cooking the flour in butter removes the raw, chalky taste and allows the starch granules to swell. When you whisk in warm milk, those starches act as a thickening agent, creating a stable emulsion. This prevents the cheese from separating into a greasy puddle and ensures a luxuriously creamy cheese sauce that coats every single noodle.
Second, the cheese blend is critical. We use a combination of sharp cheddar and Gruyère. Sharp cheddar provides that classic, tangy, nostalgic flavor we all associate with grandma’s mac and cheese. Gruyère (or a mild fontina) is an exceptional melting cheese that adds a nutty, sophisticated depth and a wonderfully smooth texture.
Finally, the bake itself transforms the dish. While stovetop macaroni is delicious, an oven-baked macaroni and cheese allows the edges to crisp up, the sauce to set slightly so it clings to the pasta, and the breadcrumb topping to toast to a perfect golden brown. It’s a textural masterpiece!
Ingredients List & Sourcing Notes
To serve 6 to 8 people, you’ll need standard US pantry staples. Here is what to grab from your local supermarket:
- 1 lb (16 oz) Elbow Macaroni: Classic elbows trap the sauce perfectly. Alternatives: Cavatappi, medium shells, or small radiatori.
- 6 tbsp Unsalted Butter: Divided. 4 tablespoons for the roux, 2 tablespoons melted for the topping.
- 1/3 cup All-Purpose Flour: This thickens the sauce. Sub: Gluten-free 1-to-1 baking flour if making a GF version.
- 4 cups Whole Milk: Whole milk provides the best richness. Sub: 2% milk works in a pinch, but avoid skim.
- 16 oz (about 4 cups) Sharp Cheddar Cheese: Crucial Tip: Buy a block and grate it yourself. Pre-shredded cheese is coated in cellulose (an anti-caking agent) that prevents it from melting smoothly, leading to a grainy sauce.
- 8 oz (about 2 cups) Gruyère Cheese: Grated from a block. Sub: Fontina, Monterey Jack, or Gouda.
- 1 tsp Dry Mustard Powder: Enhances the “cheesy” flavor without tasting like mustard.
- 1/2 tsp Garlic Powder & 1/2 tsp Onion Powder: Adds a subtle savory backbone.
- Salt & Freshly Cracked Black Pepper: To taste.
- 1 1/2 cups Panko Breadcrumbs: For that essential crunch. Sub: Crushed Ritz crackers for a true Southern-style mac and cheese vibe.
- 1/4 cup Grated Parmesan Cheese: Mixed into the topping for an extra salty, umami kick.
(Note: All dairy and pasta can be found in the standard aisles of any US grocery store like Kroger, Publix, Safeway, or Walmart.)
Step-by-Step Instructions
Follow these steps for a foolproof bake.
Phase 1: The Stovetop Prep
1. Preheat and Prep
Preheat your oven to 350°F (175°C). Lightly grease a 9×13-inch baking dish with butter or non-stick spray.
2. Boil the Pasta
Bring a large pot of salted water to a rolling boil. Add the elbow macaroni. Cook according to package directions for al dente (usually about 1-2 minutes less than the package suggests).
- Tip: Reserve 1/2 cup pasta water — it helps loosen the sauce later if it gets too thick!
Drain the pasta and set it aside. Do not rinse it; the surface starch helps the sauce cling.
3. Make the Roux
In a large Dutch oven or heavy-bottomed pot, melt 4 tablespoons of butter over medium heat. Whisk in the 1/3 cup of flour. Cook for 1 to 2 minutes, whisking constantly, until the mixture is bubbly and pale golden. It should smell slightly nutty, not burnt.
4. Build the Sauce
Slowly pour in the 4 cups of whole milk, whisking vigorously to prevent lumps. Add the dry mustard, garlic powder, onion powder, a generous pinch of salt, and black pepper. Continue to cook and whisk over medium heat for 5 to 8 minutes, or until the sauce thickens enough to coat the back of a spoon.
5. Melt the Cheese
Remove the pot from the heat. This is vital to prevent the sauce from breaking. Stir in the grated sharp cheddar and Gruyère a handful at a time until completely smooth and melted. Taste the sauce and adjust salt and pepper if needed.
Phase 2: Assembly and Bake
6. Combine
Fold the drained macaroni into the creamy cheese sauce. Stir gently until every noodle is heavily coated. If the mixture seems overly thick, stir in a splash of your reserved pasta water or a little extra milk. Pour the mixture into your prepared 9×13-inch baking dish, spreading it out evenly.
7. Create the Topping
In a small bowl, combine the Panko breadcrumbs, grated Parmesan cheese, and the remaining 2 tablespoons of melted butter. Toss with a fork until the crumbs are evenly moistened and look like wet sand. Sprinkle this mixture generously over the macaroni.
8. Bake to Golden Perfection
Bake uncovered at 350°F (175°C) for 25 to 30 minutes. You are looking for the edges to be bubbling and the center to be hot and set.
9. The Final Broil (Optional but Recommended)
For an extra-crispy crust, turn your oven to the Broil setting (High) for the final 1 to 2 minutes.
- Tip: Watch closely during the broil! Breadcrumbs can go from golden brown to burnt in seconds.
Remove from the oven and let it rest for 10 minutes before serving. This resting period allows the sauce to thicken slightly so it doesn’t run all over the plate.
Tips, Troubleshooting, and Pro Tricks
Even the easy family dinner ideas can sometimes hit a snag. Here is how to troubleshoot common how to make mac and cheese dilemmas:
- Grainy or Separated Sauce: This happens if the cheese overheats or if you used pre-shredded cheese. The Fix: Always remove the pot from the heat before adding the cheese. If your sauce breaks and looks greasy, whisk in a tablespoon of cold milk or a splash of lemon juice off the heat to help re-emulsify it.
- Sauce Too Thick or Too Thin: Pasta absorbs liquid as it bakes. If your stovetop sauce looks a little loose, don’t panic; it will firm up in the oven. If it’s like cement before baking, whisk in warm milk, 1/4 cup at a time, until it reaches a gravy-like consistency.
- Burnt Top: Ovens vary wildly. If your breadcrumb topping is browning too quickly during the 30-minute bake, simply tent the baking dish loosely with aluminum foil for the remainder of the cooking time.
- Convection vs. Conventional Oven: If you are using a convection oven (which circulates hot air), reduce the baking temperature to 325°F and check for doneness around the 20-minute mark. The top will brown much faster.
- Dry Macaroni: If your finished bake seems dry, you likely overcooked the pasta on the stove or baked it too long. Next time, undercook the pasta slightly and rely on the reserved pasta water to add moisture back into the sauce before baking.
Variations and Add-ins
One of the best things about mac and cheese variations is how easily you can customize them to suit your family’s palate. Try these fun twists:
- The Meat Lover: Fold in 1/2 pound of cooked, crumbled bacon or diced ham right before transferring to the baking dish.
- Spicy Kick: Swap half of the cheddar for Pepper Jack cheese and add a dash of hot sauce or a pinch of cayenne pepper to the roux.
- Southern-Style Mac and Cheese: For a true Southern-style mac and cheese experience, swap the milk for evaporated milk (which yields a denser, custard-like texture) and use crushed Ritz crackers mixed with melted butter for the topping.
- Veggie Boost: Stir in a cup of thawed, squeezed-dry frozen peas or roasted broccoli florets. It’s a great way to sneak in nutrients for kid-friendly dinner ideas.
- Gluten-Free: Use a high-quality brown rice or chickpea pasta, and swap the all-purpose flour in the roux for a trusted gluten-free 1-to-1 baking blend.
- Perfect Pairings: This rich dish pairs beautifully with acidic or fresh sides. Serve it alongside BBQ pulled pork, crispy fried chicken, a tangy vinegar-based coleslaw, or a bright green salad with a sharp vinaigrette to cut through the richness.
Make Ahead, Storage, and Reheating
This is an excellent make ahead mac and cheese for holidays like Thanksgiving or Christmas, or for meal-prepping busy weeks.
- Make-Ahead Fridge Method: Assemble the mac and cheese completely in the baking dish, including the topping. Cover tightly with plastic wrap and then foil. Store in the fridge for up to 24 hours. When ready to bake, let it sit at room temperature for 30 minutes, then bake as directed (you may need to add 5-10 extra minutes to the bake time since it’s starting cold).
- Freezer-Friendly Mac and Cheese: To freeze, assemble the dish but do not add the breadcrumb topping (it will get soggy). Wrap the dish tightly in a layer of plastic wrap and a layer of heavy-duty foil. Freeze for up to 2 months. Thaw completely in the fridge overnight, add the topping, and bake.
- Fridge Storage: Leftovers will keep in an airtight container in the refrigerator for 3 to 4 days.
- Reheating Mac and Cheese: The microwave is fast but can make the pasta rubbery. For best results, reheat portions in a small oven-safe dish at 350°F for 10-15 minutes. Pro Trick: Always add a splash of milk before reheating. The pasta absorbs the sauce in the fridge, and the milk restores that luxurious, creamy texture.
Join the Comfort Food Conversation!
There is nothing quite like the smell of grandma’s mac and cheese filling the house on a Sunday afternoon. I hope this recipe becomes a beloved staple in your home, bringing warmth, comfort, and plenty of smiles to your table.
Did you try this recipe? I would love to see your creations! Snap a photo of your golden baked mac and cheese and share it on Instagram, tagging us and using the hashtag #GoldenGrandmaMac. What is your favorite secret add-in? Let me know in the comments below, and don’t forget to sign up for our weekly newsletter for more comfort food recipes delivered straight to your inbox!
Recipe Card: Grandma’s Mac and Cheese Baked Golden
Yield: 6–8 servings
Prep Time: 20 minutes
Cook Time: 45 minutes (15 mins stovetop + 30 mins bake)
Total Time: 1 hour 5 minutes
Ingredients
The Pasta & Sauce:
- 1 lb (16 oz) elbow macaroni
- 6 tbsp unsalted butter, divided
- 1/3 cup all-purpose flour
- 4 cups whole milk, warmed slightly
- 1 tsp dry mustard powder
- 1/2 tsp garlic powder
- 1/2 tsp onion powder
- Salt and freshly cracked black pepper, to taste
- 16 oz (4 cups) sharp cheddar cheese, freshly grated
- 8 oz (2 cups) Gruyère cheese, freshly grated
The Breadcrumb Topping:
- 1 1/2 cups Panko breadcrumbs (or crushed Ritz crackers)
- 1/4 cup grated Parmesan cheese
- 2 tbsp unsalted butter, melted
Instructions
- Prep: Preheat oven to 350°F (175°C). Grease a 9×13-inch baking dish.
- Boil Pasta: Cook macaroni in salted boiling water until al dente (1-2 mins less than package). Reserve 1/2 cup pasta water, then drain.
- Make Roux: In a large pot, melt 4 tbsp butter over medium heat. Whisk in flour and cook for 1-2 minutes until bubbly.
- Add Milk: Slowly whisk in the warm milk, mustard, garlic powder, onion powder, salt, and pepper. Cook for 5-8 minutes until thickened.
- Melt Cheese: Remove pot from heat. Stir in cheddar and Gruyère until smooth.
- Combine: Fold the cooked pasta into the cheese sauce. Add a splash of reserved pasta water if it seems too thick. Transfer to the baking dish.
- Top: Toss Panko, Parmesan, and 2 tbsp melted butter. Sprinkle evenly over the pasta.
- Bake: Bake uncovered at 350°F for 25–30 minutes until bubbly.
- Broil (Optional): Broil on High for 1–2 minutes until the topping is deeply golden. Watch closely!
- Rest: Let stand for 10 minutes before serving to allow the sauce to set.
Estimated Nutrition (Per Serving, based on 8 servings):
Calories: ~680 kcal | Carbohydrates: 54g | Protein: 28g | Fat: 38g | Fiber: 2g
