
There is nothing quite like the aroma of a chicken pot pie with flaky crust baking in the oven to make a house feel like a home. Imagine pulling a bubbling, golden-brown masterpiece from the oven, the steam rising as you cut through the shatteringly crisp, buttery layers of the top crust to reveal a rich, creamy, and savory filling. This dish is the ultimate comfort food, wrapping nostalgia and warmth into one perfect one-dish dinner.
Whether you are looking for a cozy weekend project or an easy chicken pot pie to elevate your weeknight rotation, this recipe delivers on every front. We are ditching the bland, gummy store-bought versions in favor of a homemade chicken pot pie that boasts a deeply flavorful roux sauce, tender vegetables, and a crust that shatters at the touch of a fork.
In this guide, you will learn exactly how to make chicken pot pie from scratch, including my foolproof method for a flaky pie crust. We will cover essential pie dough tips, the best way to prevent a soggy bottom in pot pie, and clever shortcuts using rotisserie chicken or holiday leftovers. Grab your apron, and let’s get baking!
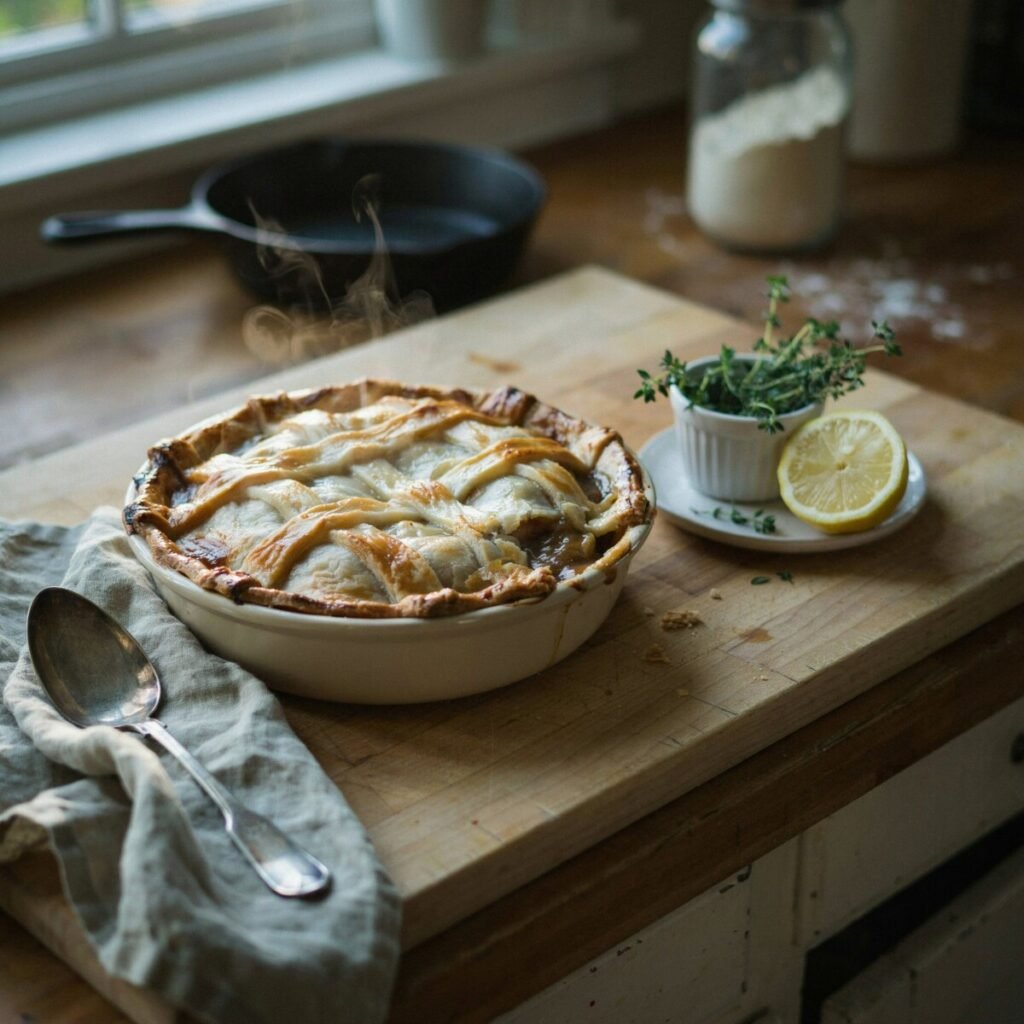
🥧 Featured Recipe Card: Classic Chicken Pot Pie
Yield: 6 servings
Prep time: 30 minutes (plus chilling)
Cook time: 45–55 minutes
Total time: 1 hour 30 minutes (including chill)
Ingredients
The Filling:
- 2 cups cooked chicken, shredded or diced (rotisserie works perfectly)
- 1 cup carrots, diced
- 1 cup frozen peas
- 1 cup celery, diced
- 1 medium onion, diced
- 4 tbsp unsalted butter
- 1/3 cup all-purpose flour
- 2 cups low-sodium chicken broth
- 1 cup milk or half-and-half
- 1 tsp salt, plus more to taste
- 1/2 tsp black pepper
- 1 tsp fresh thyme leaves (or 1/2 tsp dried thyme)
- 1 egg + 1 tbsp water or milk (for egg wash)
The Crust (Homemade Flaky Crust):
- 2 1/2 cups all-purpose flour
- 1 tsp salt
- 1 cup (2 sticks) cold unsalted butter, cubed
- 6–8 tbsp ice water
- Optional: 2 tbsp cold buttermilk for extra tenderness
(Note: You can substitute the homemade crust with 2 store-bought 9-inch pie crusts for a quicker version.)
Directions
- Prepare the Crust: Pulse flour and salt in a food processor. Add cold, cubed butter and pulse until the mixture resembles coarse peas. Drizzle in ice water (and buttermilk, if using) 1 tablespoon at a time, pulsing just until the dough holds together when pinched. Divide in half, form into discs, wrap tightly, and chill for at least 1 hour.
- Make the Filling: Preheat oven to 400°F (200°C). In a large skillet or Dutch oven, melt butter over medium heat. Sauté onion, carrots, and celery until tender (about 8 minutes). Stir in flour to make a roux; cook for 1-2 minutes. Slowly whisk in chicken broth and milk until smooth and thickened. Remove from heat and stir in chicken, peas, thyme, salt, and pepper. Let the filling cool slightly.
- Assemble: Roll out the bottom crust and fit it into a 9-inch pie dish. Pour in the cooled filling. Roll out the top crust, drape it over the filling, and trim the overhang. Crimp the edges tightly to seal. Cut 3-4 slits in the top for venting. Brush generously with egg wash.
- Bake: Bake for 40–50 minutes until the crust is deep golden brown and the filling is bubbling through the vents. Let the pie rest for 10–15 minutes before slicing to allow the sauce to set.
Why This Homemade Chicken Pot Pie Recipe Works
If you have ever wondered why restaurant savory pie tastes so much better than the frozen aisle alternatives, the secret lies in the technique and the balance of ingredients. This best chicken pot pie recipe works because it respects the fundamentals of classic American cooking while incorporating modern, time-saving tricks.
First, let’s talk about the crust. A truly flaky pie crust relies on the science of temperature. By keeping the butter ice-cold and leaving it in small, pea-sized chunks within the dough, those pockets of fat melt in the hot oven, creating steam that pushes the layers of flour apart. This results in a tender, shatteringly crisp texture that a shortening-based or store-bought crust simply cannot replicate.
Second, the filling achieves the perfect viscosity. Nobody wants a watery pot pie that leaks all over the plate, nor do they want a dense, pasty brick of flour. By building a proper roux and reducing the sauce before it goes into the pie dish, we ensure a luxurious, velvety gravy that clings beautifully to the chicken and vegetables.
Finally, this recipe addresses the biggest fear of home bakers: the dreaded soggy bottom. By cooling the filling slightly before assembly and baking the pie on a preheated surface, we guarantee a crisp, fully baked bottom crust every single time. Making it from scratch is entirely worth the effort, but as you will see below, we have plenty of shortcuts to make this an easy weeknight chicken pot pie with flaky crust when time is tight.
Ingredients Breakdown & Smart Swaps
The beauty of a chicken pot pie recipe is its versatility. It is one of the greatest leftover chicken recipes in a home cook’s arsenal. Here is a breakdown of the key ingredients and how to customize them:
- The Chicken: While poaching your own chicken breasts yields great flavor, using a store-bought rotisserie chicken is my favorite weeknight shortcut. It saves time and adds a wonderful savory depth. If you are using holiday leftovers, swap the chicken for roasted turkey and add a pinch of rubbed sage for a post-Thanksgiving treat.
- The Vegetables: The holy trinity of pot pie is onions, carrots, and celery (mirepoix), plus peas. Frozen peas are actually superior to fresh here because they are flash-frozen at peak sweetness and hold their bright green color and firm texture during baking. Feel free to add frozen pearl onions, diced parsnips, or fresh mushrooms.
- The Dairy: Whole milk creates a lovely, light cream sauce, but half-and-half will give you a richer, more decadent filling. For a dairy-free option, substitute the butter with olive oil or vegan butter, and use unsweetened oat milk or cashew milk in place of dairy.
- The Flour: Standard all-purpose flour is perfect for both the roux and the crust. If you want an exceptionally tender crust, you can swap half of the all-purpose flour for pastry flour, though it is not strictly necessary.
- Gluten-Free Swaps: To make this a gluten-free dish, use a high-quality 1:1 gluten-free baking flour for the roux and the crust. Note: Gluten-free pie dough is more fragile; roll it out between two sheets of parchment paper to prevent tearing.
How to Make Chicken Pot Pie (Step-by-Step Expanded Guide)
While the recipe card gives you the quick roadmap, mastering the pot pie with flaky crust is all about the details. Let’s break down the crucial steps.
How to Make a Flaky Pie Crust for Chicken Pot Pie
The golden rule of pie dough is: Keep your fats cold. If your butter starts to soften or melt while you are working the dough, stop immediately and put the bowl in the freezer for 10 minutes.
- The Pulse Method: Use a food processor for speed, but pulse in short bursts. You want to see visible chunks of butter coated in flour. If you process it until it looks like sand, you will lose your flaky layers.
- Hydration: Add your ice water one tablespoon at a time. The dough is ready when you can grab a handful and squeeze it, and it holds together without crumbling, but isn’t wet or sticky.
- Resting: Chilling the dough for at least an hour relaxes the gluten (preventing a tough crust) and firms the butter back up.
Building the Creamy Roux Sauce and Filling
A great roux sauce is the backbone of the filling. After sautéing your mirepoix in butter until the onions are translucent and the carrots are just tender, sprinkle in the flour.
- Helpful Tip: Cook the flour and butter mixture for 1 to 2 minutes before adding liquid. This cooks out the raw flour taste and gives the sauce a nutty, rich foundation.
- Slowly whisk in the chicken broth and milk. Bring it to a gentle simmer. If your filling seems thin, simmer 2–3 minutes longer to thicken. It should coat the back of a spoon heavily. Remember, it will thicken even more as it bakes in the oven.
- Crucial Step: Let the filling cool for 15–20 minutes before assembling. Dumping boiling hot filling into a raw pie crust will instantly melt the bottom layer of butter, resulting in a gummy, underbaked bottom.
Assembling, Sealing, and Baking
- Rolling: Roll your bottom crust out to about 12 inches in diameter. Gently ease it into the pie dish without stretching it (stretched dough shrinks in the oven).
- Filling & Topping: Add the cooled filling. Roll out the top crust. Drape it over the pie and press the edges of the top and bottom crusts together firmly.
- Crimping & Venting: Crimp the edges using your fingers or a fork to create a beautiful seal. Cut slits in the top. These vents are non-negotiable; they allow steam to escape so your pie doesn’t explode or become waterlogged.
- The Egg Wash: Whisk one egg with a tablespoon of water or milk. Brush this over the top crust. This is the secret to a bakery-style, shiny, deep-golden finish.
The Best Way to Prevent a Soggy Bottom in Pot Pie
The phrase “soggy bottom” strikes fear into the hearts of bakers. Because pot pie filling is wet and heavy, the bottom crust often fails to crisp up. Here are the three best methods for soggy bottom prevention:
- The Preheated Baking Sheet: Place a heavy, rimmed baking sheet or a pizza stone in the oven while it preheats. When you are ready to bake, place your pie dish directly onto the hot surface. The immediate blast of bottom heat jump-starts the baking of the lower crust.
- Cool the Filling: As mentioned above, never put hot filling into raw dough. Let your savory filling cool down to lukewarm before assembly.
- The Blind-Bake Method (Optional): If you want absolute insurance, you can use a pre-baked crust for the bottom. Line the bottom crust with parchment, fill it with pie weights or dried beans, and bake at 375°F for 15 minutes. Remove the weights, let it cool slightly, add the filling, top with the raw top crust, and bake as directed. (Note: The preheated baking sheet method is usually sufficient and much less work!)
Easy Weeknight Chicken Pot Pie with Flaky Crust: Shortcuts & Variations
We all have those nights where the idea of making pie dough from scratch feels overwhelming. Here is how to adapt this into a quick easy chicken pot pie without sacrificing flavor.
- The Store-Bought Shortcut: Skip the homemade dough entirely. Purchase a box of refrigerated, rolled pie crusts. Let them come to room temperature for 15 minutes before unrolling so they don’t crack.
- Biscuit-Topped Pot Pie: Skip the bottom and top crusts. Pour your hot filling into a greased 9×13 baking dish or a cast-iron skillet. Drop spoonfuls of raw biscuit dough (store-bought or homemade drop biscuits) directly over the top. Bake at 400°F until the biscuits are golden and the filling is bubbly. This biscuit-topped pot pie is incredibly fast and deeply comforting.
- Mini Pot Pies: Want portion control or a fun freezer-friendly lunch option? Line a muffin tin with circles of pie dough, fill with the chicken mixture, and top with smaller dough circles. Mini pot pies bake much faster—check them at the 25-minute mark!
- Deep-Dish Skillet Version: Make the filling in a 10-inch cast-iron skillet. Skip the bottom crust entirely, roll out a single top crust, and drape it right over the skillet, tucking the edges inside. It’s rustic, beautiful, and saves time.
- Flavor Variations: Swap the thyme for fresh rosemary or tarragon. Stir in a splash of white wine or a tablespoon of Dijon mustard when building the roux for a sharper, more complex flavor profile. Add a handful of fresh spinach or chopped sun-dried tomatoes right before baking.
Make-Ahead, Freezer-Friendly Storage, and Reheating Tips
One of the greatest advantages of a savory pie is how beautifully it stores, making it a staple for meal prep and freezer-friendly dinners.
- Make-Ahead (Fridge): You can assemble the entire pie, cover it tightly with plastic wrap, and store it in the refrigerator for up to 24 hours before baking. When you are ready to bake, add 10–15 minutes to the baking time since it will be going into the oven cold.
- Freezing Raw Pies: Assemble the pie in a disposable aluminum pie pan. Wrap it tightly in a layer of plastic wrap, followed by a layer of heavy-duty aluminum foil. Freeze for up to 3 months. Bake straight from frozen: Do not thaw. Bake at 400°F, covered with foil for the first 30 minutes, then uncover and bake for an additional 30-40 minutes until bubbly.
- Storing Leftovers: Baked leftovers can be stored in an airtight container in the fridge for 3-4 days. (Always follow USDA guidance on handling cooked poultry and refrigerate within two hours of baking).
- Reheating for Maximum Crispness: The microwave will turn your beautiful crust into a soggy mess. To reheat slices, place them on a baking sheet in a 375°F oven for 10–15 minutes. Reheating tip: If the crust is browning too quickly, cover it loosely with foil while the filling heats through. This re-crisps the crust beautifully.
Serving Suggestions and Side Dishes
Because this chicken pot pie with flaky crust is a rich, heavy one-dish dinner containing protein, starch, and vegetables, you want to pair it with sides that offer brightness, acidity, and crunch.
- Salads: A simple green salad with a sharp, lemony vinaigrette or an arugula salad with shaved parmesan cuts right through the richness of the creamy sauce.
- Vegetables: Serve alongside roasted asparagus, garlicky green beans, or honey-glazed carrots.
- Beverage Pairings: For a family-style dinner, pair this comfort food with a crisp, light beer like a Pilsner or a Lager. If you prefer wine, a lightly oaked Chardonnay or a bright, acidic Sauvignon Blanc complements the creamy roux and fresh herbs perfectly. For a non-alcoholic option, sparkling apple cider or iced tea with a squeeze of lemon is incredibly refreshing.
Bring the Comfort Home
There is a profound sense of accomplishment that comes with creating a homemade chicken pot pie from scratch. From the tactile joy of rubbing cold butter into flour to the anticipation of watching that golden crust puff up in the oven, this recipe is a labor of love that pays off in every single bite.
We hope this guide becomes your go-to resource for the best chicken pot pie recipe in your repertoire. Whether you are using up holiday leftovers, relying on a trusty rotisserie chicken, or taking the time to craft the perfect flaky pie crust on a lazy Sunday, this dish is guaranteed to bring smiles to your dinner table.
We want to hear from you! Did you try the biscuit topping? Did you sneak some extra mushrooms into the filling? Leave a comment below, rate the recipe, and share your photos on social media using the hashtag #FlakyPotPie.
Don’t forget to subscribe to our newsletter for weekly comforting winter dinner recipes, and check out our guides on [How to Make Pie Crust from Scratch] and [Easy Rotisserie Chicken Recipes] for more kitchen inspiration!
