
Steam curls from a freshly split buttermilk biscuit as a peppery ribbon of sausage gravy settles into its warm nooks. In kitchens across the American South, biscuits and gravy have long been a weekend ritual, a hearty reward for early risers, and the ultimate cure for slow, lazy mornings. There is something profoundly comforting about this dish—a humble combination of pantry staples transformed into a masterpiece of Southern hospitality. Whether you grew up watching your grandmother expertly cut cold butter into flour, or you are discovering this comfort food breakfast for the very first time, mastering this meal is a rite of passage for any home cook.
This classic Southern biscuits and gravy recipe shows you exactly how to make tall, flaky biscuits and creamy, pepper-forward sausage gravy from scratch. We will explore the rich culinary history behind this beloved dish, break down the essential ingredients, and provide a foolproof, easy-to-follow guide to recreating it in your own kitchen. Plus, we have included practical troubleshooting tips, mouthwatering variations, and make-ahead advice so you can serve a perfect southern breakfast every single time. Get your skillet ready; it is time to bring the taste of the South to your table.
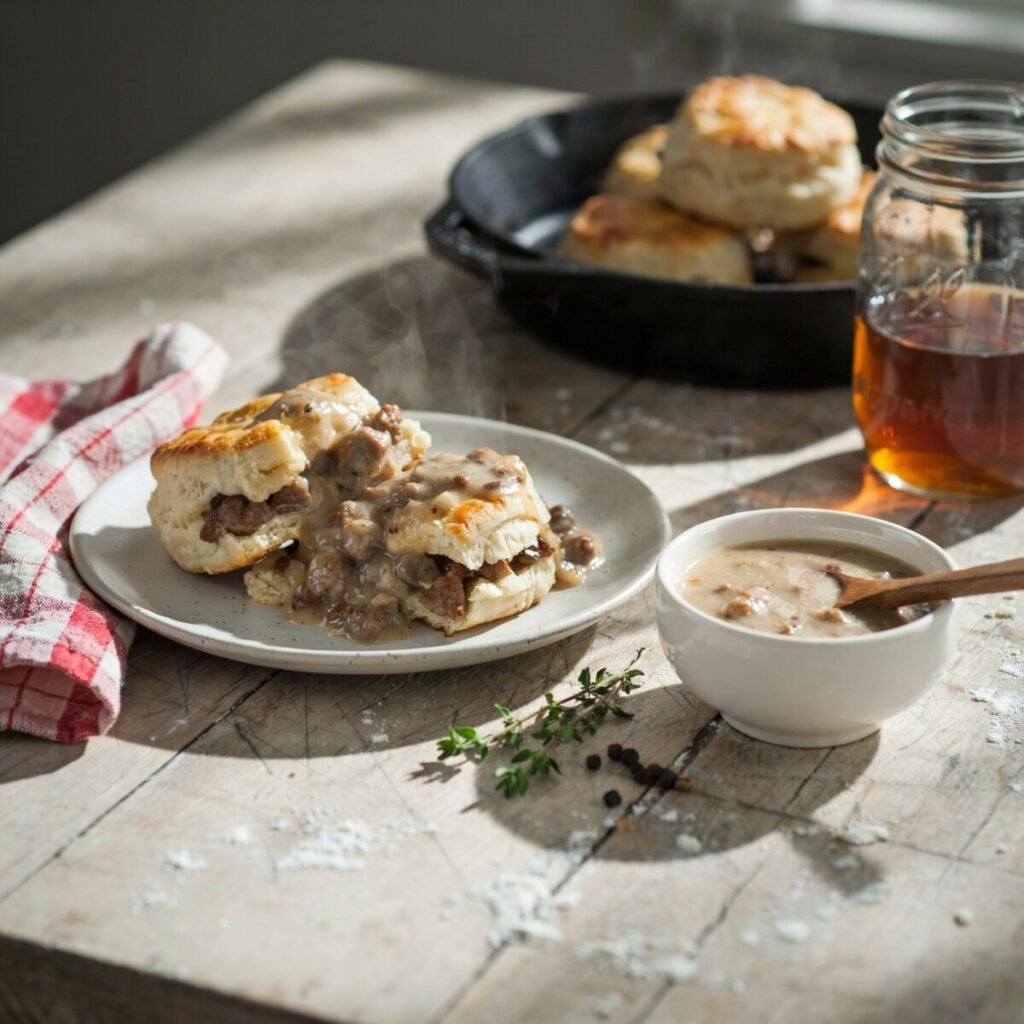
History & Regional Background
Before we dive into the recipe, it is worth exploring the roots of this iconic dish. Biscuits and gravy as we know it today emerged in the late 19th and early 20th centuries in the Appalachian Mountains and the broader American South. Following the Civil War, the region faced significant economic hardships, making frugality a necessity in the kitchen. Cooks relied on inexpensive, readily available pantry staples—flour, lard or shortening, milk, and locally ground pork—to stretch their food budgets and feed hungry families.
The biscuit itself evolved from hardtack and scones, becoming lighter and fluffier with the advent of commercial baking powder and baking soda. Meanwhile, the gravy—often referred to as sawmill gravy or country gravy—was born out of the sawmills of Appalachia. Lumberjacks needed calorie-dense, filling meals to sustain them through grueling physical labor. Cooks would use the rendered fat from frying breakfast sausage, thicken it with flour, and whisk in milk to create a rich, hearty sauce to pour over dense breads.
As the dish spread, regional differences began to emerge. In some parts of the South, you might find a lighter, milk-heavy white gravy, while other regions prefer a thicker, almost paste-like sawmill gravy loaded with extra black pepper. In Texas, you might encounter a slightly spicier version featuring chorizo or hot sausage, whereas in the Deep South, the focus remains strictly on traditional breakfast pork sausage and a heavy hand with cracked black pepper. Despite these regional nuances, the soul of this classic southern recipe remains the same: a celebration of rustic, unpretentious cooking that brings people together around the breakfast table.
Ingredients Explained
Creating the perfect biscuits and gravy relies on a short list of simple ingredients, but understanding their roles is crucial for success. Let us break down what you will need for both the buttermilk biscuits and the homemade sausage gravy.
For the biscuits, all-purpose flour provides the ideal structure, while baking powder and a pinch of baking soda act as the leavening agents that give your flaky biscuits their lift. Cold fat is non-negotiable: whether you use unsalted butter for rich flavor or vegetable shortening for a higher rise and tender crumb, it must be ice-cold to create those signature steam pockets. Buttermilk adds a distinct tang and reacts with the baking soda for extra lift, though whole milk can be substituted in a pinch.
For the sausage gravy, high-quality pork breakfast sausage is the star. You can use regular, mild, or spicy (often called “hot” sausage) depending on your heat preference. The rendered fat from the sausage forms the base of your roux. You will need more all-purpose flour to thicken the gravy, and whole milk is the traditional liquid of choice for a creamy texture. Some cooks prefer to use a splash of heavy cream for a richer finish. Finally, kosher salt and freshly cracked black pepper are essential—do not skimp on the pepper, as its sharp bite cuts through the richness of the gravy.
Step-by-Step Classic Recipe
Yield: 4–6 servings | Prep time: 20 mins | Cook time: 25 mins
Part 1: The Buttermilk Biscuits
- Prep your tools and ingredients: Preheat your oven to 450°F (230°C). Line a baking sheet with parchment paper. Measure out 2 cups of all-purpose flour, 1 tablespoon of baking powder, 1/4 teaspoon of baking soda, and 1 teaspoon of kosher salt. Whisk them together in a large bowl.
- Cut in the fat: Take 1/2 cup (1 stick) of unsalted butter that has been in the freezer for 15 minutes, or 1/2 cup of cold vegetable shortening. Cut it into small cubes. Add the cold fat to your dry ingredients. Using a pastry blender or two forks, cut the fat into the flour until the mixture resembles coarse crumbs with some pea-sized pieces of fat remaining. Pro Tip: Those visible chunks of fat are the secret to flaky biscuits!
- Add the liquid: Make a well in the center of the mixture and pour in 3/4 cup of cold buttermilk. Stir gently with a wooden spoon or silicone spatula just until the dough comes together. It should look shaggy and slightly sticky. Do not overmix, or your biscuits will be tough.
- Fold and shape: Turn the dough out onto a lightly floured surface. Gently pat it into a rectangle about 1/2-inch thick. Fold the dough in half, pat it down, and fold it in half one more time. This simple folding technique creates distinct, flaky layers. Pat the dough down one last time to about 3/4-inch thickness.
- Cut and bake: Use a 2.5-inch round biscuit cutter to stamp out your biscuits. Press straight down and pull straight up—do not twist the cutter, as this seals the edges and prevents rising. Place the biscuits on your prepared baking sheet, letting them barely touch so they help each other climb in the oven. Bake for 12–15 minutes, or until golden brown on top.
Part 2: The Homemade Sausage Gravy
- Brown the sausage: While the oven is preheating, place a large cast-iron skillet over medium-high heat. Add 1 pound of pork breakfast sausage (casings removed if using links). Break the meat apart with a wooden spoon and cook until deeply browned and crumbled, about 6 to 8 minutes. Do not drain the fat; that liquid gold is the flavor base for your country gravy!
- Build the roux: Reduce the heat to medium. Sprinkle 1/4 cup of all-purpose flour evenly over the cooked sausage and its rendered fat. Stir constantly for 2 to 3 minutes. The flour will absorb the fat and turn a light golden brown. Cooking the roux removes the raw flour taste and ensures a smooth, velvety texture.
- Whisk in the milk: Slowly pour in 3 cups of whole milk, whisking constantly to prevent lumps. Bring the mixture to a gentle simmer, then immediately reduce the heat to low.
- Simmer and season: Allow the gravy to simmer for 5 to 7 minutes, stirring frequently, until it thickens enough to coat the back of a spoon. Season with 1/2 teaspoon of kosher salt and a very generous amount of freshly cracked black pepper (start with 1 to 2 teaspoons). Taste and adjust. If the gravy is too thick, whisk in a splash of extra milk. If it is too thin, let it simmer for another minute or two.
Timing and Assembly
To pull this meal together seamlessly, start your biscuits first. Once they are in the oven, immediately start browning the sausage for the gravy. By the time the biscuits are out of the oven and resting for a few minutes, your sausage gravy will be perfectly thickened and hot. To serve, split a warm biscuit in half using a fork (this preserves the flaky crumb), ladle a generous amount of sausage gravy over the top, and serve immediately.
Troubleshooting and Pro Tips
Even experienced cooks can run into hiccups when making this classic dish. Here is how to troubleshoot common issues and elevate your technique.
- Dense, tough biscuits: This is almost always caused by overworking the dough or using warm ingredients. Keep your butter, buttermilk, and even your mixing bowl as cold as possible. Handle the dough gently and only until it just comes together.
- Biscuits that did not rise: Check the expiration date on your baking powder—it loses potency after six months. Also, ensure you did not twist your biscuit cutter when stamping out the dough, as this seals the edges.
- Lumpy gravy: If your country gravy develops lumps, do not panic. Vigorously whisk the gravy, or use an immersion blender for a few seconds to smooth it out. To prevent lumps in the first place, ensure your roux is smooth before adding the milk, and whisk continuously as you pour the liquid in.
- Gravy that is too greasy: If a layer of oil separates and pools on top of your gravy, your roux did not absorb all the fat. You can skim off the excess oil with a spoon, or whisk in a tiny bit more flour cooked in a separate small pan.
- Reheating tips: Biscuits and gravy are best eaten fresh, but leftovers can be saved. Store them in separate airtight containers in the fridge for up to 3 days. Reheat the gravy gently on the stove over low heat, adding a splash of milk to loosen it up. Reheat biscuits wrapped in foil in a 350°F oven for 10 minutes, or pop them in the toaster oven.
Variations and Serving Ideas
While traditional sausage gravy is a masterpiece, there is plenty of room for creativity. For a vegetarian version, swap the pork for plant-based breakfast sausage crumbles and use olive oil or vegan butter to build your roux, whisking in unsweetened almond or oat milk. If you love umami, sauté sliced cremini mushrooms and diced onions with your sausage for a rich, earthy mushroom gravy. For an extra-indulgent treat, try making cheese-stuffed biscuits by wrapping biscuit dough around a cube of sharp cheddar before baking.
If you want to switch up the protein, crumbled country ham or thick-cut bacon makes excellent alternatives to sausage, creating a deeply savory country gravy. Spice lovers can kick things up a notch by adding a pinch of cayenne pepper, crushed red chili flakes, or a dash of hot sauce directly into the gravy.
When it comes to serving, this hearty southern breakfast pairs beautifully with classic sides like creamy cheese grits, scrambled eggs, or a side of braised collard greens. Do not forget the hot sauce on the table! Wash it all down with a tall glass of iced sweet tea or a steaming mug of dark roast coffee.
Nutrition and Make-Ahead Notes
Biscuits and gravy is the ultimate comfort food breakfast, designed to stick to your ribs and provide sustained energy. A standard serving offers a moderate amount of calories, with a good balance of carbohydrates from the biscuits and protein from the pork sausage. If you are looking for lighter swaps, you can use lean turkey sausage, substitute half of the butter in the biscuits with Greek yogurt, and use low-fat milk for the gravy.
To get a head start on busy mornings, you can make the biscuit dough up to a day in advance, cut out the shapes, and freeze them on a baking sheet before transferring to a freezer bag. Bake straight from frozen, adding a few extra minutes to the baking time. The gravy can also be made a day ahead and gently reheated with a splash of milk.
Conclusion & Call-to-Action
There is nothing quite like the aroma of fresh baking biscuits and savory sausage filling your kitchen on a weekend morning. This classic Southern biscuits and gravy recipe brings a taste of tradition right to your breakfast table. We hope you enjoy making this dish as much as eating it! If you try this recipe, please leave a comment below with your favorite variations, or share a photo on social media and tag @YourHandle. Looking for more southern breakfast inspiration? Check out our roundup of [easy breakfast recipes] and the ultimate guide to [southern sides].
Printable Recipe Card
Classic Southern Biscuits and Gravy
Prep Time: 20 mins | Cook Time: 25 mins | Yield: 4-6 servings
Ingredients
For the Biscuits:
- 2 cups all-purpose flour
- 1 tbsp baking powder
- 1/4 tsp baking soda
- 1 tsp kosher salt
- 1/2 cup (1 stick) unsalted butter, very cold (or cold vegetable shortening)
- 3/4 cup cold buttermilk
For the Sausage Gravy:
- 1 lb pork breakfast sausage (mild or spicy)
- 1/4 cup all-purpose flour
- 3 cups whole milk (plus extra for thinning)
- 1/2 tsp kosher salt
- 1 to 2 tsp freshly cracked black pepper
Instructions
- Preheat oven to 450°F (230°C). Line a baking sheet with parchment paper.
- Whisk flour, baking powder, baking soda, and salt in a large bowl. Cut in cold butter until mixture resembles coarse crumbs. Stir in buttermilk just until dough forms.
- Turn dough onto a floured surface, fold in half twice, and pat to 3/4-inch thickness. Cut with a 2.5-inch biscuit cutter (do not twist). Bake 12-15 mins until golden.
- In a large skillet over medium-high heat, brown the sausage, breaking it into crumbles. Do not drain the fat.
- Reduce heat to medium. Sprinkle flour over sausage and cook for 2-3 minutes to form a roux.
- Slowly whisk in the milk. Simmer for 5-7 minutes until thickened. Season with salt and generous black pepper.
- Split warm biscuits and ladle sausage gravy generously over the top. Serve immediately.
Frequently Asked Questions (FAQ)
Can I use store-bought biscuits?
Yes! While homemade buttermilk biscuits taste significantly better and offer a superior flaky texture, high-quality refrigerated biscuit dough (like Grands!) is a fantastic time-saving shortcut. Just bake them according to the package directions and focus your energy on perfecting the homemade sausage gravy.
How long does sausage gravy keep in the fridge?
Sausage gravy will keep well in an airtight container in the refrigerator for up to 3 days. Because it thickens as it cools, you will need to gently reheat it on the stove over low heat, adding a splash of milk or water to loosen it back to a creamy consistency.
Can I make the biscuits ahead of time?
Absolutely. You can cut out the raw biscuit dough and freeze the unbaked biscuits on a baking sheet. Once frozen solid, transfer them to a freezer-safe bag. When you are ready to bake, place them straight from the freezer onto a baking sheet and bake at 450°F, adding about 3 to 5 extra minutes to the cooking time.
